
You've already seen the first one in my previous puppet post - it's a sock puppet. It's a dog and its name is Pluto.

This one is a hand puppet. If you want to make it yourself, you need a foam (or styrofoam) ball, water colours (optional) and some fabric. First, you'll make the puppet's head using the foam ball. You can colour it the way you like or even put a nylon sock over it if you want it skin-toned. Draw eyes, nose etc. on its head or use buttons. You'll also want to dig a hole in the foam ball for your finger. Make the hole big enough to fit your index finger up to the first joint. The hole should fit a little loose on your finger.
As for the body, take your fabric, cut out two equal parts and sew or stick them together. Leave a hole on top to put your finger in. The whole piece should fit on your hand so I suggest you put your hand on the material you intend to use and draw the body loosely around it before cutting. To join the head and the body together, use a plastic roll or make one out of cardboard. The roll must fit around your finger and in the holes in your puppet's head and costume. Join the parts together and you're finished!
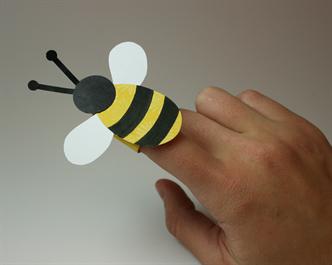
Here's a photo of my hand puppet:

I'm a little snowman, short and fat,
here's my scarf and here's my hat!
here's my scarf and here's my hat!
http://www.theclassroomcreative.com
There are loads of finger puppet templates online you or your students could use. My students made their own finger puppets in the shape of stars and the Moon and we now use them to act out the In The Sky stories (Reach for the Stars coursebook).
We also made flat rod puppets which are also relatively easy to make. All you need is some cardboard and a rod. Flat rod puppets simply have a support rod attached to the back. You can make them with or without movable parts. If you want movable parts - hands, legs and such - on your rod puppet, you have to fix them loosely on the puppet's body. You can fix these parts on extra rods to control them or leave them to move freely when you move your puppet. I made a Dumbo puppet with movable ears but the cardboard got wet on the way home and it's no longer useful, so here's a sketch.


I use it for the "Five Little Green Frogs" song. However, I change the lyrics to "Three Little Green Frogs" as I could only fit three frogs in the cup.
I'll end this blog with a gif of Prince with his pop-up puppet. And yes, I'm a Prince fan. :)

No comments:
Post a Comment